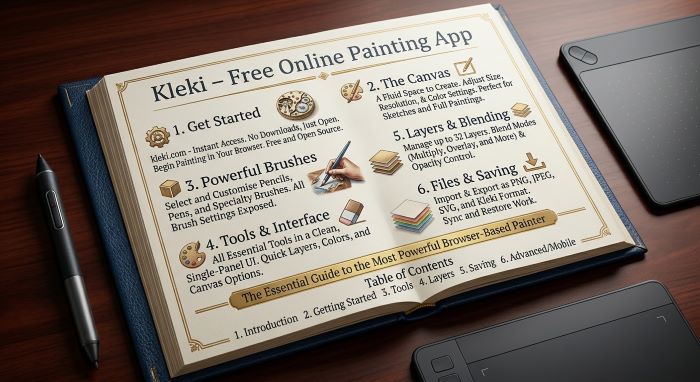
Kleki
You open a browser tab, and a blank canvas is ready before you finish your coffee. No account, no download, no ads, and no trial timer counting down. That is the promise of Kleki, a free painting app that has quietly served artists, students, and hobbyists since 2010. It runs on a laptop, a phone, or an iPad, supports pen pressure, and offers layers, filters, and seven brushes. This guide explains how it works, walks through every major tool, and shows you how to make your first digital drawing, save it, and get better results over time.
What Is Kleki?
Kleki is a free, browser-based painting program created and maintained by an independent programmer and artist known as bitbof. Development began in 2010. The project was inspired by early browser drawing applets such as Oekaki Shi-Painter and Lascaux Sketch, which were popular on online art boards in the 2000s.
Its stated goal is simple: to be the go-to tool for quickly creating fun paintings. Rather than trying to copy every feature of professional software, it focuses on fast, enjoyable drawing with a clean set of tools.
| Detail | Information |
|---|---|
| Type | Free online painting and drawing app |
| Creator | bitbof (independent developer and artist) |
| First released | 2010 |
| Open-source version | Klecks, released under the MIT License in 2022 |
| Price | Free |
| Ads | None, by the developer’s stated choice |
| Account needed | No |
| Devices | Desktop, laptop, tablet, and phone |
| Languages | More than 10 |
The Klecks Connection
In 2022, the developer released the app’s source code as an open-source project called Klecks on GitHub. Klecks uses the permissive MIT License, so other developers can study the code, run their own copy, or embed the painting tool in their websites. Drawing community sites such as 2draw.net use it this way. The original app’s name and brand stay with bitbof, so services built on the code need a separate license to use that name.
How the App Works Without Installing Software
The app runs entirely in your web browser. When you visit the site, your browser loads the program, and all drawing happens on your own device. Your artwork is not uploaded to a server while you paint.
This design brings a few practical benefits:
- No installation. There is nothing to download or update.
- Works on many devices. Any modern browser can run it.
- Offline use. According to the official help pages, once you have opened the app once, it keeps working without an internet connection.
- Privacy. Since there is no account and no cloud storage, your drawings stay on your device unless you choose to share them.
The trade-off is that there is no autosave to the cloud. You need to save your files yourself, which we cover later in this guide.
Exploring the Interface
The screen has two main areas: the canvas, where you draw, and a side panel with tools and settings.
The Side Panel
The side panel contains:
- The tool row, with the brush, paint bucket, gradient, text, shapes, select tool, and hand tool
- Tabs for brush settings, layers, edit functions (filters), the file menu, and settings
- The color picker, with a main and a secondary color
- Undo and redo buttons
Handy Interface Options
- Dark mode makes long sessions easier on the eyes.
- Left-handed mode moves the panel to the left side of the screen.
- Hide UI clears the panel away on small screens, leaving compact on-canvas controls.
- Brush size and opacity appear in a small on-screen display as you adjust them.
Moving Around the Canvas
You can zoom, pan, rotate, and flip your view. On a touchscreen, two fingers move and zoom the canvas. With a mouse, the scroll wheel zooms, and a trackpad also supports smooth zooming. Double-tapping centers the canvas.
Drawing Tools Every Beginner Should Know
Beyond brushes, the app includes a solid set of supporting tools.
Paint Bucket
The paint bucket fills an area with color. It has a Grow setting that expands the fill slightly into line art, which helps avoid thin white gaps along the edges of your lines. You can also control how it reads the image so the fill does not leak through small gaps.
Gradient Tool
The gradient tool fades one color into another or into transparency. It is useful for skies, shading, and soft backgrounds.
Shape Tool
The shape tool draws rectangles, ellipses, and straight lines. The line option shows a live preview, so you can place lines at any angle with accuracy.
Text Tool
The text tool adds words to your image. You can choose from several fonts, add an outline, and import your own font file for the current session.
Select and Transform
Added in 2024 and improved in 2025, the select tool lets you choose part of your image and then move, scale, rotate, warp, or clone it. Selections also limit where other tools and edit functions work, so you can apply a filter to just one area.
Eyedropper
The eyedropper picks a color straight from your canvas. It is one of the fastest ways to keep colors consistent when painting.
Brushes, Colors, and Customization Options
The Seven Brushes
The heart of the app is its brush set. Each brush has a different personality:
| Brush | Best For | Key Settings |
|---|---|---|
| Pen | Sketching, inking, everyday drawing | Size, opacity, scatter; circle, chalk, calligraphy, and square tips |
| Blend | Soft, watercolor-style painting | Size, opacity, blending |
| Sketchy | Loose, energetic sketches with fine connecting lines | Size, opacity, blending, scale |
| Pixel | Pixel art and hard-edged patterns | Size, opacity, circle or square shape, dither and custom patterns |
| Chemy | Symmetric, abstract shapes | Fill, stroke, mirror symmetry, gradient |
| Smudge | Smearing and softening existing paint | Size, opacity |
| Eraser | Removing paint | Size, opacity; transparent background option |
A few notes on how they behave:
- Pen is the workhorse. The chalk tip adds texture, and the calligraphy tip gives a chisel-like stroke that thickens and thins with direction.
- Blend mixes your color with paint already on the layer, much like wet paint.
- Sketchy draws extra fine lines between nearby strokes, a style borrowed from the classic Harmony drawing app.
- Chemy, adapted from the Webchemy project, turns a single line into a filled, symmetric shape. It is great for patterns and mandalas.
- Eraser paints white on the bottom layer unless you turn on the transparent background setting. On other layers, it always erases to transparency.
Lock Alpha
The padlock icon turns on Lock Alpha. When it is on, you can only paint where the layer already has paint. That makes it easy to recolor line art or shade inside a shape without going over the edges.
Straight Lines
- Hold Shift and click to draw a straight line from the end of your last stroke.
- Hold Shift while dragging to keep a stroke perfectly horizontal or vertical.
Colors
The color picker supports:
- A main and a secondary color you can swap between
- Manual entry of hex and RGB values
- The eyedropper for sampling colors from the canvas
Pen Pressure and the Stabilizer
The app supports pen pressure through modern browser input, including Apple Pencil and other styluses. Pressure can change the size and opacity of strokes, which makes lines look more natural.
The stabilizer smooths out shaky lines by slightly delaying and averaging your strokes. It is especially helpful for clean inking with a mouse or a trackpad.
Understanding Layers
Layers work like stacked sheets of clear plastic. You can draw on one without touching the others, which makes editing far easier.
What You Can Do With Layers
- Add, delete, and duplicate layers
- Rename layers to stay organized
- Hide or show a layer with the visibility toggle
- Change opacity to fade a layer
- Use blend modes such as multiply and screen to change how layers mix
- Merge a layer with the one below, or merge all layers at once
- Clipping masks limit a layer’s painting to the shape of the layer below it
The Layer Limit
The app supports up to 16 layers per image. For most illustrations, that is plenty. A common setup might use one layer each for the sketch, line art, flat colors, shading, highlights, and background.
A Simple Layer Workflow
- Sketch on the first layer with a light color.
- Ink on a new layer above it, then hide or lower the opacity of the sketch.
- Add flat colors on a layer under the line art, using the paint bucket.
- Shade on a clipping mask layer above the colors, with the multiply blend mode.
- Add highlights on another clipped layer with a light color.
Filters and Edit Functions
The Edit tab holds a range of filters and adjustments, many powered by WebGL for speed. Options include:
- Blur and tilt-shift
- Curves for adjusting brightness and contrast
- Distort and warp
- Noise and patterns
- Grid and vanishing point guides for perspective drawing
- Line art extraction, which turns a scanned sketch into clean lines on a transparent layer
- Crop, extend, resize, rotate, and flip
- To Alpha, which turns white into transparency
These tools let you finish an illustration without leaving the app.
How to Make Your First Digital Drawing
Here is a simple step-by-step path for beginners.
Step 1: Open the App
Visit the website in any modern browser. A blank canvas loads right away.
Step 2: Set Up Your Canvas
Open a new image and choose a size. A 1500 by 1500 pixel square works well for social media posts. The maximum canvas size is 2048 by 2048 pixels.
Step 3: Sketch Your Idea
Select the pen brush with a light gray color and a small size. Draw loose shapes to plan your picture. Do not worry about mistakes; undo is always one click away.
Step 4: Ink Your Lines
Create a new layer. Pick a dark color and turn on the stabilizer. Trace over your sketch with steady strokes. Then hide the sketch layer.
Step 5: Add Base Colors
Create a new layer below the line art. Use the paint bucket with the Grow setting to fill each area with a flat color.
Step 6: Shade and Highlight
Add a layer above the colors and set it as a clipping mask. Use a darker color and the blend brush to add shadows. Repeat with a lighter color for highlights.
Step 7: Add Final Touches
Use filters, a gradient background, or text to finish the piece.
Step 8: Save Your Work
Save the image as a PNG to share it, or as a PSD to keep your layers for later editing.
Using It for Sketching, Digital Painting, and Pixel Art
Sketching
The pen and sketchy brushes make fast sketching easy. The sketchy brush in particular creates a lively, hand-drawn look in seconds, which is ideal for warm-up drawings and quick studies.
Digital Painting
For painterly work, combine the blend brush, the smudge brush, and layers with blend modes. Start with large shapes of color, then refine the details. The blend brush lets colors mix naturally, much like traditional paint.
Pixel Art
The pixel brush draws hard-edged pixels without blurry edges. Turn on pixelated zoom in the settings to see each pixel clearly while you work. Dither and custom patterns help with shading in a retro style.
What Else You Can Create
- Comic panels and simple storyboards
- Character designs and fan art
- Greeting cards and posters
- Patterns and mandalas with the chemy brush
- Photo edits and doodles over imported images
- Classroom drawings and visual notes
Does It Work on Tablets and Touchscreens?
Yes. The app works on phones, iPads, Android tablets, and touchscreen laptops. On touch devices, you can use these gestures:
| Gesture | Action |
|---|---|
| Two-finger drag | Move the canvas |
| Two-finger pinch | Zoom in or out |
| Two-finger tap | Undo |
| Three-finger tap | Redo |
Stylus pressure works with the Apple Pencil and many other pens. On small screens, the hide UI button gives you more room to draw. Keep in mind that large canvases with many layers need more memory, so older phones and tablets may slow down with complex images.
How to Save and Export Your Drawings
Because the app has no cloud storage, saving is important. The official Help center lists these options:
| Format | Best For | Notes |
|---|---|---|
| PNG | Finished art and sharing | Keeps transparency |
| JPG | Small file sizes | Transparent areas turn black |
| PSD | Keeping layers for later editing | Opens in many art programs |
| Layers as PNG | Exporting each layer separately | Useful for animation or game assets |
| Browser storage | A quick backup inside your browser | Holds one image only |
Helpful Saving Features
- Ctrl+S (or Cmd+S on a Mac) saves in the last format you chose.
- A save reminder pops up if you have not saved in a while. You can adjust it in the settings.
- Tab recovery, added in 2025, starts about five minutes after you begin working and keeps recoveries for seven days. It can rescue work if a browser tab closes by accident.
- Copy to clipboard lets you paste your drawing straight into another app.
- Sharing options let you send your image to other apps on supported devices.
You can also import images, including photos, sketches, and PSD files. Note that PSD files with more than 16 layers open as a single flattened image.
Is Kleki Free to Use?
Yes. The app is free, with no account, no subscription, and no paid tier. The developer has stated a belief that the app should have no ads. The open-source Klecks code is also free under the MIT License.
If you plan to use your drawings for commercial projects, check the site’s terms and privacy pages for the most current details.
Advantages and Limitations
Advantages
- Free and ad-free
- No sign-up or download
- Works offline after the first visit
- Runs on almost any device, from phones to desktops
- Pen pressure and stabilizer support
- Layers, blend modes, and clipping masks
- A good set of filters, including perspective guides and line art extraction
- PSD import and export for moving work into other programs
- Open-source code under the MIT License
- Available in more than 10 languages
Limitations
- Maximum canvas size of 2048 by 2048 pixels, which is too small for large print work
- Up to 16 layers, which may feel tight for complex illustrations
- No cloud storage or autosave to the cloud, so you must save files yourself
- Browser storage holds only one image
- No animation timeline
- No real-time collaboration on the main site
- Performance depends on your device, especially on older phones
Kleki vs. Other Online Drawing Programs
| Program | Platform | Cost | Best For |
|---|---|---|---|
| This app | Browser | Free, no ads | Quick sketches and paintings on any device |
| Photopea | Browser | Free with ads; paid ad-free option | Photo editing and Photoshop-style work |
| Krita | Desktop download | Free and open source | Full-featured digital painting |
| Procreate | iPad app | One-time purchase | Professional illustration on iPad |
| Drawpile | Desktop and browser | Free and open source | Drawing together with others online |
The app stands out for speed and simplicity. Photopea offers more photo editing power but feels closer to Photoshop. Krita and Procreate offer far more features for serious illustrators but need a download or a purchase. Drawpile focuses on collaboration. For quick, fun painting with zero setup, this browser tool is hard to beat.
Tips for Getting Better Results
- Use a stylus if you can. Pen pressure makes a huge difference in line quality.
- Turn on the stabilizer for inking. It smooths out wobbles, especially with a mouse.
- Work on separate layers. Keep sketch, lines, colors, and shading apart so you can fix mistakes easily.
- Use clipping masks. They keep shading neatly inside your colored shapes.
- Zoom out often. Viewing your whole drawing helps you spot problems with proportions.
- Flip the canvas. A mirrored view reveals mistakes your eyes have gotten used to.
- Save often in PSD format. It keeps your layers safe for later edits.
- Learn the shortcuts. Shift for straight lines and E for the eraser speed up your work.
- Try every brush. Each one opens new styles, from watercolor to pixel art.
- Keep your canvas size sensible. Very large images with many layers can slow down phones and older tablets.
Who Should Use Kleki?
The app suits a wide range of people:
- Beginners who want to try digital art without spending money
- Students and teachers who need a simple tool for class projects
- Hobby artists who enjoy quick sketches and doodles
- Experienced artists looking for a fast tool for warm-ups and concept sketches
- Pixel artists who want a simple pixel brush with patterns
- Chromebook users and anyone who cannot install software on their device
Professional illustrators who need large print files, animation, or many layers will likely use it alongside a more advanced program rather than as their main tool.
Frequently Asked Questions About Kleki
Do I need to create an account? No. You can start drawing as soon as the page loads.
Can I use it offline? Yes. After you open the app once, it works without an internet connection.
Does it save my work automatically? There is no cloud autosave. Tab recovery can restore recent work for up to seven days, but you should still save files regularly.
How many layers can I use? Up to 16 layers per image.
What is the largest canvas size? 2048 by 2048 pixels.
Does it support Apple Pencil? Yes, including pressure sensitivity.
Can I open my drawing in Photoshop or Krita? Yes. Save it as a PSD file to keep your layers.
Who makes it? An independent developer and artist known as bitbof, who has worked on it since 2010.
For detailed, up-to-date instructions on every feature, visit the official Kleki Help center.
A Simple Canvas With Real Depth
Some art tools overwhelm you with menus before you draw a single line. This one does the opposite. It opens fast, stays out of your way, and still offers layers, pressure-sensitive brushes, filters, and PSD support. Whether you are sketching on a phone during a commute, painting on an iPad at home, or teaching a class on a shared Chromebook, it gives you a capable canvas for free. Start with a few simple sketches, explore each brush, and save your work often. You may be surprised how far a browser tab can take your art.
Key Takeaways
- Kleki is a free, ad-free painting app that runs in your browser with no account or download.
- It was created by the independent developer bitbof and has been in development since 2010.
- Its open-source version, Klecks, is available under the MIT License.
- The app offers seven brushes: pen, blend, sketchy, pixel, chemy, smudge, and eraser.
- You get up to 16 layers, blend modes, clipping masks, filters, and a select tool.
- The maximum canvas size is 2048 by 2048 pixels.
- You can save as PNG, JPG, PSD, or separate layer files, and it works offline after the first visit.
- It works on desktops, tablets, and phones, with pen pressure and touch gestures.